

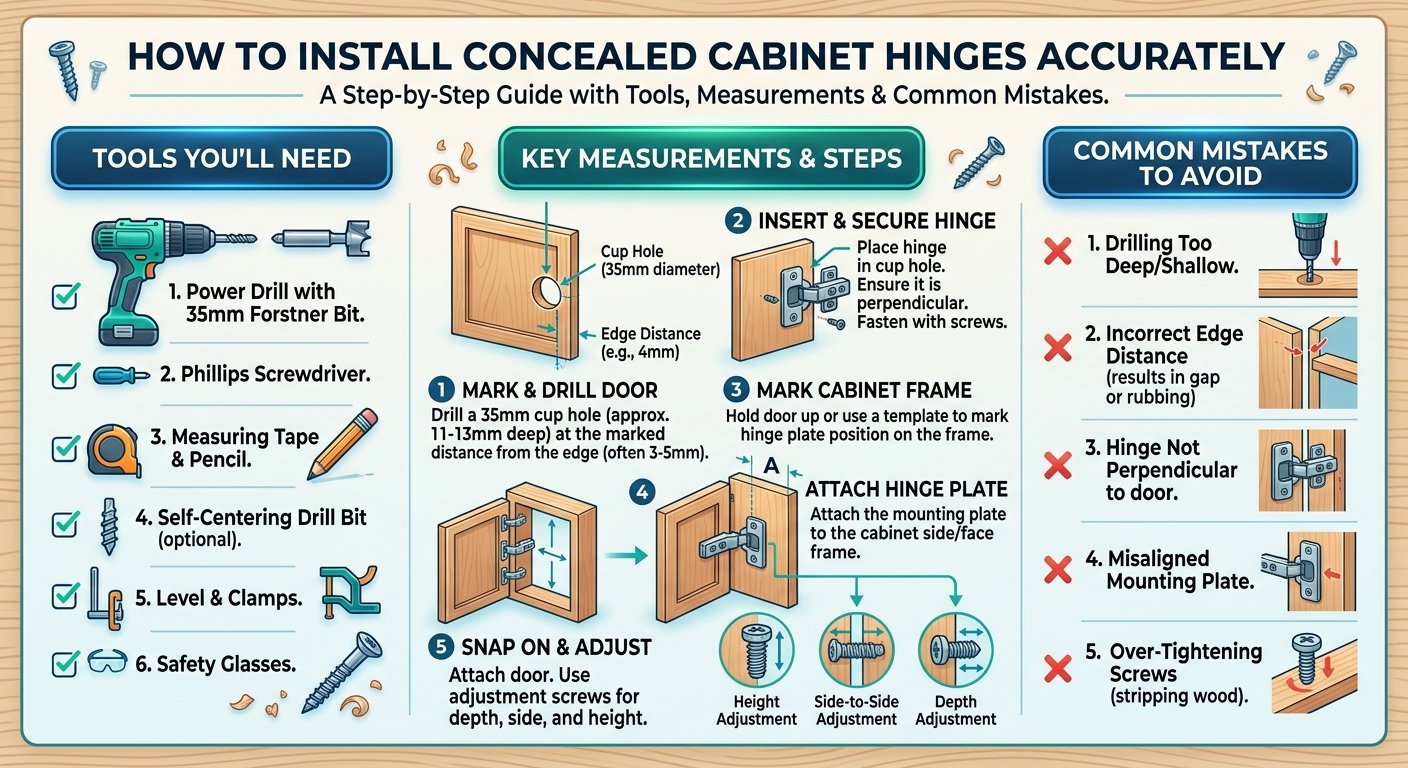
Installing concealed cabinet hinges can give kitchen cabinets, wardrobes, and furniture projects a clean, professional appearance. Unlike traditional surface-mounted hinges, concealed hinges are hidden when the cabinet door is closed. However, achieving a neat fit requires careful measurements, accurate drilling, and the right woodworking tools.
Whether you are upgrading an existing cabinet or building furniture from scratch, learning how to install concealed hinges correctly can save time and prevent common alignment problems.
What Are Concealed Cabinet Hinges?
Concealed cabinet hinges, sometimes called European-style hinges, are designed to sit inside the cabinet door and frame. They typically consist of a hinge cup that fits into a circular recess in the back of the door and a mounting plate attached to the cabinet.
One advantage of this design is adjustability. Many concealed hinges allow you to adjust the door vertically, horizontally, and in or out. This makes them particularly useful for modern cabinets where consistent gaps between doors are important.
Before purchasing hinges, check the door thickness, cabinet construction, hinge opening angle, and overlay requirements. Choosing a hinge that does not match the cabinet design can create installation problems later.
Essential Tools for the Job
You do not need a large workshop to install concealed hinges, but having the right tools makes the process much easier. A measuring tape, pencil, drill, screwdriver, combination square, and drill bits are basic necessities.
A Forstner bit is especially useful because concealed hinge cups require a clean, flat-bottomed circular recess. The most common hinge cup size is around 35 mm, although you should always check the specifications of the hinge you are installing before drilling.
A clamp can also help keep a guide or template securely positioned. If you are installing several hinges, a dedicated concealed hinge jig can make the process considerably more consistent by helping position the hinge cup and mounting holes accurately.
Step 1: Measure the Door
Start by placing the cabinet door on a stable, protected work surface. Decide where the hinges will be positioned. For many cabinet doors, the upper and lower hinges are positioned a short distance from the top and bottom edges.
The exact measurement depends on the hinge manufacturer and cabinet design, so avoid relying on a generic measurement when the hinge instructions provide a specific specification.
Mark the center points carefully with a pencil or marking knife. Measure both hinge locations from the same reference edge to ensure they are aligned.
If you are installing hinges on multiple doors, make a simple measurement guide or template. Repeating the same reference points will help keep every door consistent.
Step 2: Mark the Hinge Cup Position
The hinge cup needs to be positioned at the correct distance from the edge of the door. This measurement is important because moving the cup even slightly can affect the door’s overlay and how it sits against the cabinet.
Place the hinge or installation template against the door and mark the center of the cup hole. Double-check the measurement before drilling.
If you are working on expensive hardwood, painted doors, or finished furniture, test the measurements on a scrap piece of similar material first. This simple step can prevent an irreversible mistake.
Step 3: Drill the Hinge Cup Hole
Install the appropriate Forstner bit in your drill and set the drilling depth according to the hinge manufacturer’s specifications. A drill press is ideal because it keeps the bit perpendicular to the door, but a hand drill can also work when used carefully with a suitable guide.
Drill slowly and avoid forcing the bit into the material. Stop at the correct depth rather than drilling completely through the door.
The recess should be clean and flat, with enough room for the hinge cup to sit properly. Remove wood chips before testing the hinge.
Step 4: Install the Hinge
Insert the hinge cup into the hole and align the screw holes. Depending on the hinge design, you may need to secure it using screws or another mounting system.
Drive the screws firmly but avoid overtightening them. Excessive force can strip the wood, especially in softer materials or thin cabinet doors.
Repeat the process for the remaining hinges, checking that they are oriented in the same direction.
Step 5: Attach the Mounting Plates
The next step is installing the mounting plates inside the cabinet. Their position determines how the door connects to the cabinet frame.
Use a square to make sure the mounting plates are straight. If the plates are positioned inconsistently, the doors may sit at different heights or angles.
When installing several cabinet doors, establish a consistent measurement and use it throughout the project. Consistency is often more important than speed when installing a complete set of cabinets.
Step 6: Attach and Adjust the Door
Connect the hinges to the mounting plates and carefully close the door. At this stage, do not worry if the door is not perfectly aligned.
Most concealed hinges provide adjustment screws. Depending on the hinge design, these can be used to change the door’s side-to-side position, depth, and vertical alignment.
Make small adjustments and close the door after each change. This approach makes it easier to identify which adjustment is producing the desired result.
When installing multiple doors next to one another, check the gaps between them as well as the distance from the cabinet frame.
Common Installation Mistakes
Drilling Too Deep
One of the most damaging mistakes is drilling the hinge cup hole too deeply. This can break through the front of the cabinet door or leave a visible mark.
Always establish the correct drilling depth before starting. A depth stop or carefully positioned drill guide can provide additional control.
Measuring From Different Reference Points
If one hinge is measured from the top edge and another from a different reference point, small inconsistencies can become obvious once the doors are installed.
Choose a reference edge and use the same method for every door.
Skipping a Test Piece
If you have never installed a particular hinge before, testing it on scrap material is worthwhile. It allows you to confirm the cup diameter, depth, mounting position, and screw placement before working on the actual cabinet.
Overtightening Screws
Cabinet doors are often made from relatively thin material. Overtightening can strip the screw holes or damage the surface.
Tighten the screws until the hinge is secure, then stop. If a screw hole becomes loose, a suitable wood repair method may be necessary before reinstalling the hinge.
Ignoring Door Overlay
Overlay refers to how much the cabinet door covers the cabinet opening or frame. Different hinges and mounting configurations are designed for different overlay measurements.
Check the hinge specifications before purchasing or installing the hardware. The wrong configuration can prevent the door from closing correctly even when the hinge itself has been installed accurately.
Making Installation More Consistent
For a single cabinet door, careful hand measurement may be enough. However, larger furniture projects can involve dozens of hinge holes. In these situations, a repeatable setup becomes extremely valuable.
This is where products and installation accessories from Fivalo can be useful for DIYers and woodworking enthusiasts who want greater consistency when working on cabinet hardware.
A jig or template can reduce the amount of measuring required for each door. More importantly, it can help ensure that holes are positioned consistently across a group of cabinet doors.
Final Checks Before Finishing
Once all hinges are installed, open and close every door several times. Look for uneven gaps, rubbing, loose screws, or doors that do not sit flush with neighboring doors.
Check the hinges again after making adjustments. A screw that is slightly loose can cause a door to shift over time.
For a professional-looking result, focus on three things: accurate measurements, perpendicular drilling, and consistent hinge placement. The quality of the final installation usually depends more on these fundamentals than on having expensive equipment.
Conclusion
Installing concealed cabinet hinges accurately is a manageable DIY woodworking project when you take the time to measure carefully and use appropriate tools. A Forstner bit, square, drill, clamps, and a reliable concealed hinge jig can make the process significantly easier, especially when several doors need identical hinge placement.
Whether you are renovating kitchen cabinets, building a wardrobe, or creating custom furniture, accurate hinge installation will improve both the appearance and functionality of the finished project. Taking a few extra minutes to measure, test, and adjust can make the difference between a cabinet that simply works and one that looks professionally built.

